


How to Do All-Key-Lost with Autel MaxiIM IM608 and XP400 and APA106 (Dump Mode) ?

How to Do All-Key-Lost withAutel MaxiIM IM608and XP400 and APA106 (Dump Mode) for Range Rover 2018?
(Note: If you encounter any type of problem during the process, please upload the data log on the top-right corner after failing to perform the functions. Please connect your device to the network while performing the following functions.)
Specific add key ( all-key-lost ) procedure is as follows:

Click “Manual Selection”

Click“Range rover”

Click “2015”

Click“Click intelligent”

Read“Operate Guide”carefully before starting the procedure.

The procedure is as follows:
Start Key Writing
Steps for learning a smart key with the Start Key Writing function:
1. Remove the RFA and read its data
2. Save
the data ( default save path: scan/UserData/JLRData )
3. Perform the Start Key Writing function to generate new
data
4. Write the new data back to the RFA and assemble the vehicle
5. Verify the key function
For details, refer to the operation introduction for the Start Key Writing function in the operation guide.
Note:There is no emergency start function for the newly added key.

RFA (also called KVM) module located:

Remove the module:

And remove the case
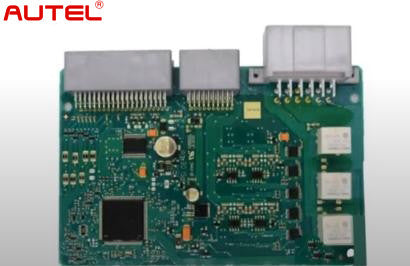
De-solder the crystal:

Solder the lines
T1 and T2 are the components of capacitor and crystal.

After you have connected the MCU to the programmer XP400 with APA106 cable:
Step 1: Click“Read Chip Status”to check if the MCU is locking or
unlocking (read chip from MCU);
Step 2: Click“Read / Write chip data
(Secured)” to read MCU Dflash and eeprom file.
Step 3:
Click“Start Key Writing”, use the Dlash and eeprom file to make dealer key and write
the new created Dflash file and eeprom file back to MCU
Step 4: Click“Read / Write chip
data (Secured)”to write new data back to MCU.

Click “Read Chip Status”

Click “Locking”

Click “Read / Write chip data (Secured)”

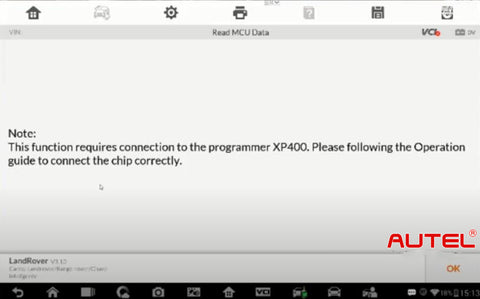
Click “Read MCU Data”

Note: This function requires connection to the programmer XP400.
Please follow the operation guide
to connect with the chip correctly.
Click “D-FLASH”

Read the data successfully, click “OK” to save the data
Dflash file name
Click “Confirm” to save the Dflash file.
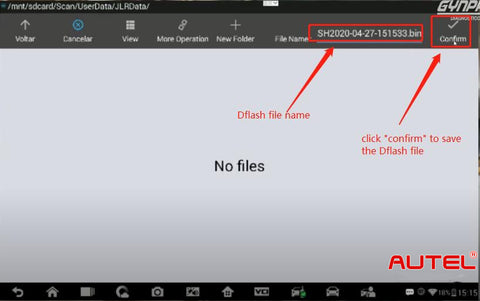
File path to save the Dflash:( default save path: scan/UserData/JLRData )

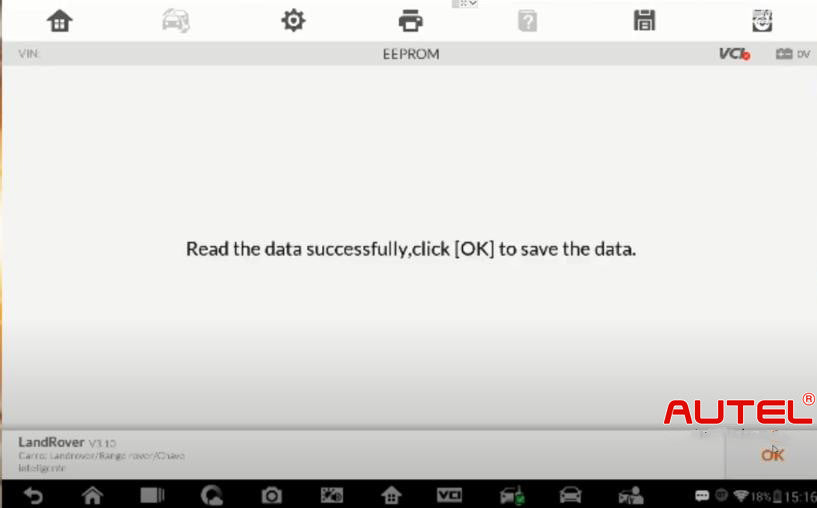
Click “EEPROM”

Read the data successfully, click “OK” to save the data.

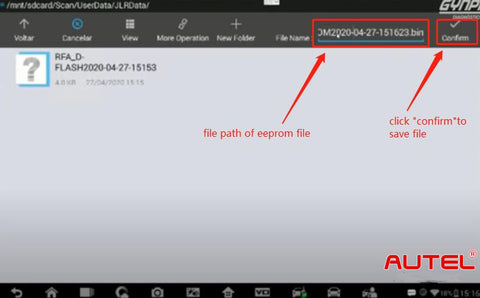
File path of eeprom file, click “Confirm” to save file.
Saving Succeeded.

Then continue the last step to “start key writing”

Start Key Writing
Note:
This function requires the device to connect to XP400 for performing
this function.
1. Please remove the RFA according to the Operation Guide, follow the guide to connect the
chip correctly, and then read and save the EEPROM / DFLASH data.
2. Please save the stored data into
the “Scan/UserData/JLRData” file in this device.
Select the Dflash and EEPROM file that you have saved, then choose a blank key position ID to make the dealer key.
Click “RFA_D-FLASH2020-04-27-151533.bin” file
“Are you sure to select RFA_D-FLASH2020-04-27-151533.bin file?”
Click “OK”
Please select the EEPROM file.
Click “RFA_EEPROM2020-04-27-151623.bin” file
Are you sure to select RFA_EEPROM2020-04-27-151623.bin file?
Click “OK”
Select a key position that is blank
Click “Add Key” to Continue

Please ensure that programmer is well connected and place the key to be added in the key sensing area of the programmer!
A dealer key is created successfully.
A new key ID has been created.

Do you want to exit the Start key writing function and save the new DFLASH and EEPROM dat
file?
Click “Yes”
The data file is saved successfully. Please use the Write into MCU function to write the newly create
DFLASH and EEPROM data file into the RFA.
After the data writing is complete, install the smart box onto
the vehicle, and verify if the newly added key can start the vehicle, and whether the remote controller is
normal.
The name and directory of the newly created data file are as the following picture:
Click
“OK”
Then go back to the menu “Read / write chip Data (Secured) “ to write the new created Dflash file and EEPROM file back to the MCU.
Click “Write MCU Data”
Click “D-FLASH”
Please select the DFLASH file
Write the new created Dflash file back to the MCU
Connecting to the programmer
Writing the chip, please wait…
Writing succeeded
Click “EEPROM”
Write the new created EEPROM file back to the MCU

Writing succeeded
DONE!
Related Posts:
1.Autel
Maxisys Pro VS Elite (Comparison and Review 2021)
3.Autel MP808K or IM508? Which car key programmers is better?


